Local recording and storing mocap data

mocap local recording

Get to know more about recording your facial mocap data locally with MocapX.

MocapX allows users to stream facial motion capture data to Maya. This happens in real-time and the data are stored and transferred to rigs and models in Maya.

The new MocapX 2.0 now allows you to record data locally as well. This means that you don’t need to have a computer present with Maya running. All you need is an iPhone or iPad to record all your data. This is extremely handy in situations like voice recordings, on stage recordings and other cases where your computer isn’t around.


facial motion capture data

So, in the application, go to the second tab called Recording. Hit record and perform an action. Once you’ve finished your recording, the video and data will be saved. When you click on the folder icon, you will find a list of your recordings. 

Then, click on the share icon and both the video and data will automatically be sent to your computer. Note that the video is captured without a 3D mask so that the captured performance can be accessed for future use if necessary.

Get MocapX – the facial motion capture app! 

TUTORIAL – mocap data connection with PoseBoard

mocap poseboard data connection mocap

Tutorial – We’ve introduced a new pose editor to MocapX 2.0 called PoseBoard.

We’ve introduced a new editor to the previously announced MocapX 2.0 called PoseBoard. In this tutorial,  we are going to explain why it is useful and how to use it. 

When you open our demo character Lucy in Maya, you’ll see a full rig and a lot of controllers.

So what we want to do here is select all of the controllers and add them to our Attribute Collection. We can start by hiding everything and showing just the controllers. Let’s select all of them and create an Attribute Collection by clicking on the icon on the shelf.

Now if we opened the Poselib editor, we would typically have to go to our online documentation, find the pose we want to create and then go back to Maya and recreate it. This would be a tedious process as you would need to constantly switch back and forth between Maya and your browser. So for MocapX 2.0 we came up with PoseBoard to make things easier.

So let’s go back to Maya. Open PoseBoard from the Shelf. Now what we see is a list of all the expressions that are currently tracked and supported by MocapX and that can be matched to your rig or model using Blendshapes.

In the PoseBoard editor you can go through all of the poses, see how they look and easily create them. So for example let’s create eyeBlink Left. First, find the pose. Then, adjust the rig so the character has their left eye closed. And now simply click on the add button.

poseboard mocap data editor

Now when we open the PoseLib editor we can see that our first pose is there. We can test it by moving the slider to the right. 

We can continue by creating the rest of the poses. As you can see in PoseBoard, once a pose is created it turns grey. This indicates that the pose is already on the PosLib list. If we delete the pose from the PoseLIb editor, it will turn on again in PoseBoard.

So let’s fast forward and jump to a scene where all the poses have already been created. Now all we have to do is simply create a realtime device, connect to your iPhone or iPad, click auto connect in PoseLib and we are live streaming the motion capture data.

Download MocapX 2.0 and the MocapX app now!

MocapX 2.0 update – local mocap data save, new trial option, and updated Maya plugin!

facial motion capture maya plugin

We’ve worked hard in the last couple of months on making facial motion capture process better for our customers. With version 2.0 of MocapX, we are bringing you new features in the iOS application as well as in the Maya plugin. We’ve included the three most requested features by the animation community. 

Local data storage and trial/demo feature

In MocapX 2.0 app, you can record facial motion capture data locally without the need for streaming directly to Maya. This is an essential feature in situations like recording sound with a voice actor. Now you don’t need to bring a computer with Maya installed for the recording session. You can store all your facial data on your iPhone and use it later in Maya. With this new functionality, we are able to let our new users test the application in trial mode. Now you can record up to 30 seconds of facial mocap data before deciding to buy the PRO version.

facial mocap iphone

Updated Maya plugin
In the Maya plugin, we are introducing the Pose Board feature. This enables you to see the description of all required poses for matching a 3D character expression to actor expressions. As a result, it is even easier to prepare your character for motion capture. 

facial mocap maya plugin
facial motion capture maya plugin

Subscribe to our newsletter

TUTORIAL – Zbrush blend shapes

zbrush tutorial face animation mocap

Tutorial – Learn how to animate face from Zbrush and use it for facial motion capture

In today’s tutorial, we’re going show you how to create blendshapes in Zbrush or any other sculpting software and then bring these blendshapes back into Maya and connect them with MocapX.

First, let’s open Zbrush with a sculpt of a basic head. We need to create blendshapes.  Let’s go to Zplugins, and under Maya Blend Shapes, click create new. Now, if we go to the layers tab, we can see a new layer. Let’s rename this to eyeBlink_L.

Now we will shape the geometry. So let’s select the Move brush and shape the pose. If we are finished, we can see the blendshape by moving the slider. Let’s continue and create a blink for the right eye. So go to the blendshape tab. Click create new. Now we can see another layer. Let’s call it eyeBlink_R. Now let’s do the same for the right eye.

facial mocap how it works
If you go to Mocapx.com section for documentation, you can find a list of all poses that need to be done for the best result. To speed up the tutorial, we are going to open a Zbrush file where we already created all the blendshapes. You can see the result by setting the value to 1. If we are done with it, go to the Zplugin menu – Maya Blend Shapes – and press Export Blend Shapes. Now Maya is open, and in the outliner, we can find the head with already connected blendshapes. If we select the head’s geometry and go to the Channel box, under blendshape there is a list of them. You can also create blendshapes in Maya or import them from any other 3d application like 3ds max, blender, or others. Now we are ready to connect MocapX data to the blendshapes. First, we need to create a real-time device. If we go to the attribute editor, we can choose either Wi-Fi or USB. If you have the MocapX app on your iPhone or iPad Pro running, just click on connect, and Maya will connect the app. Now we need to open the connection editor. On the left side, we’re going to load the Real-Time device, and on the Right side, we’re going to select and load our blendshape. Now we simply connect one by one by name. You can speed things up with our script that we included in the description bellow.
facial mocap maya editor

Now we are live streaming data to our character. Let’s add the head movement. So select the geometry and load it on the right side. Now we will connect: translate and rotate from the Real-Time device to our head. So we’ve added the translate and rotate.

The last step is to add the eye movement. Let’s select the left eye. Load it on the right side and connect the rotation from Real-Time. Now let’s do the same for the Right eye. Now lets record some data for the clip. Go to the Realtime device, select a 15 sec clip, and hit record. By doing this, we record the past 15 second to clip. Next, let’s preview the clip.

So we will select a Mocap node. Create a Clip reader and load that clip. If we go to the time slider, we can now scrub and see our clip. If we switch to Real-Time again, we’re still streaming from the iPhone. If we go back to the Clip reader and select the head, we can use our Baking tool for baking data from the clip to an fbx file. Now we can export this animation as an fbx to Unity or Render in Maya.

TUTORIAL – MocapX and Advanced Skeleton

Tutorial – Learn how to use MocapX and Advanced Skeleton rig

In this tutorial, we’re going to learn how to use the advanced skeleton rig or any other custom facial Rig together with MocapX. We will start by downloading an example Rig from the advanced skeleton page. You can use any of these rigs, but we’re just going to choose this one.

Now if we open Maya, we can see that the facial Rig has a combination of several different types of controllers. Some are on the face itself others are on a separate picker with other attributes such as blinking.

The way it works is that it transfers the facial expression which is captured on iPhone onto the Rig controllers. For this, we use the Poselib Editor to match these Expressions. The idea is that the rig should end up with keyframes directly on the controller’s just as an animator would use classic keyframe animation. This, in general, gives the animator a chance to work efficiently with the motion capture data and still have the ability to do keyframe animation.

facial mocap how it works

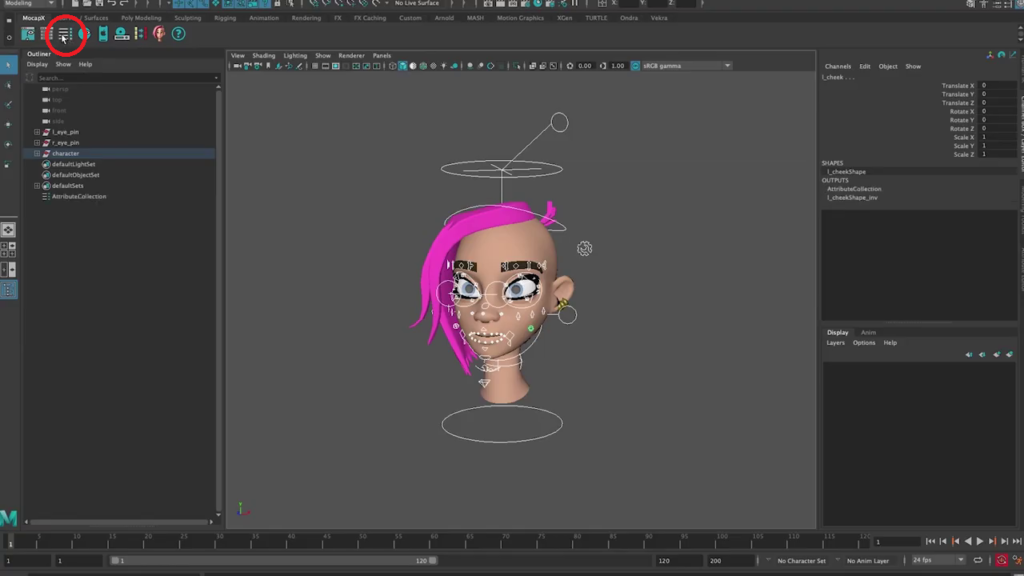
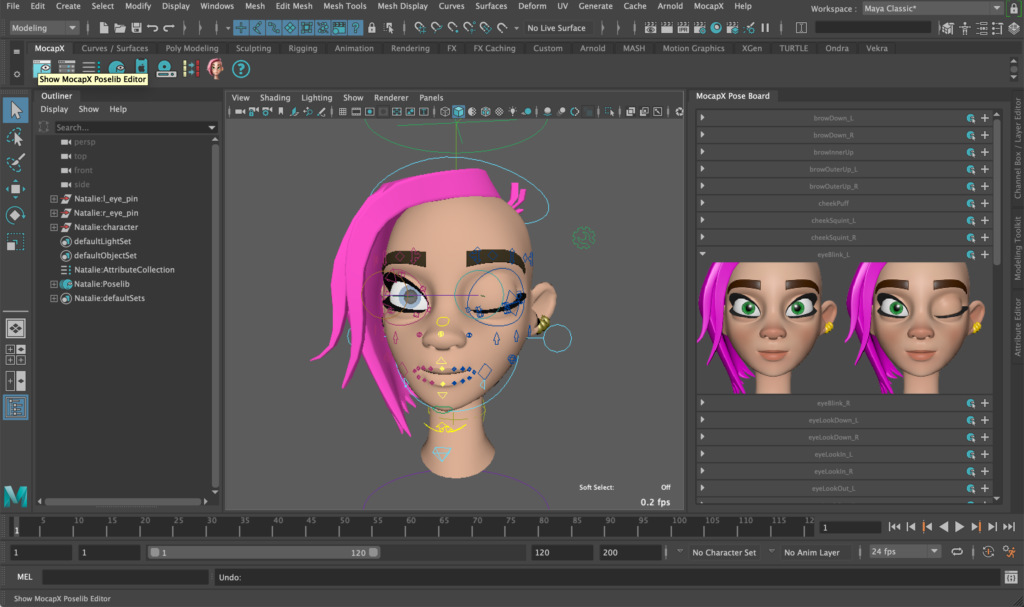
So let’s start with creating poses for this character. Make sure that you have a natural or relaxed face with open eyes as your default pose. This will always be our Base pose. We’ll start by selecting all the controllers on the head and create an attribute collection which stores all the channels. Next, we will make our first pose which is a left eye blink. We’ll take the controller and shape the eye into a blink.

We can use all the controllers for the attribute collection. Once we are done, we can click the button for creating the pose. Now if we open the Poselib editor, the first pose is created. We can use the slider and move it to see our pose. Let’s rename it to EyeBlink_L. 

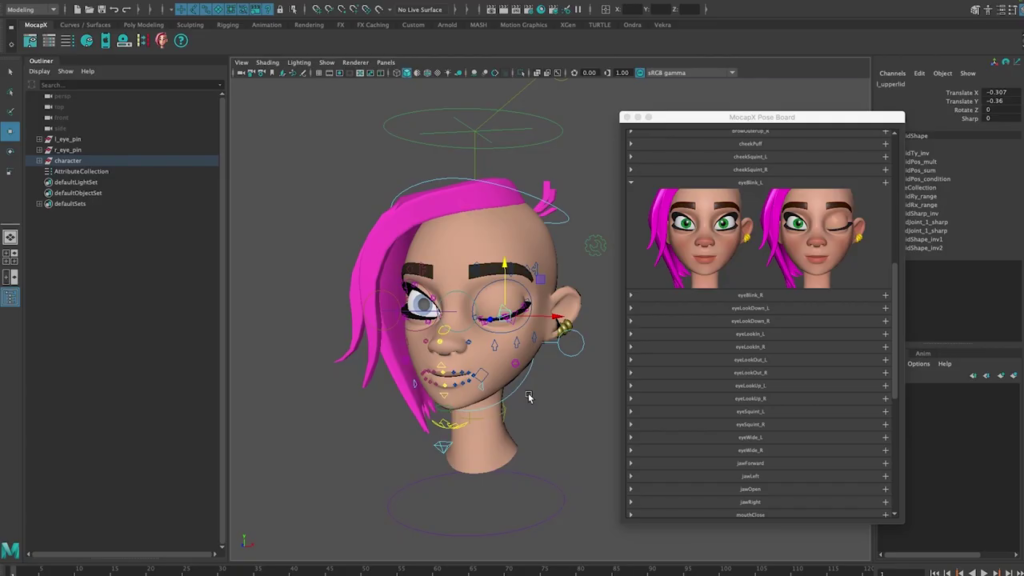
Now let’s do the right eye. First, we need to go back to default. Now let’s shape the right eye blink and click the button again. Now we can see both our poses. It’s similar to blend shapes but done with controllers. If you name the poses according to the description, you can later use the auto-connect feature to match them with the data from your iPhone. 

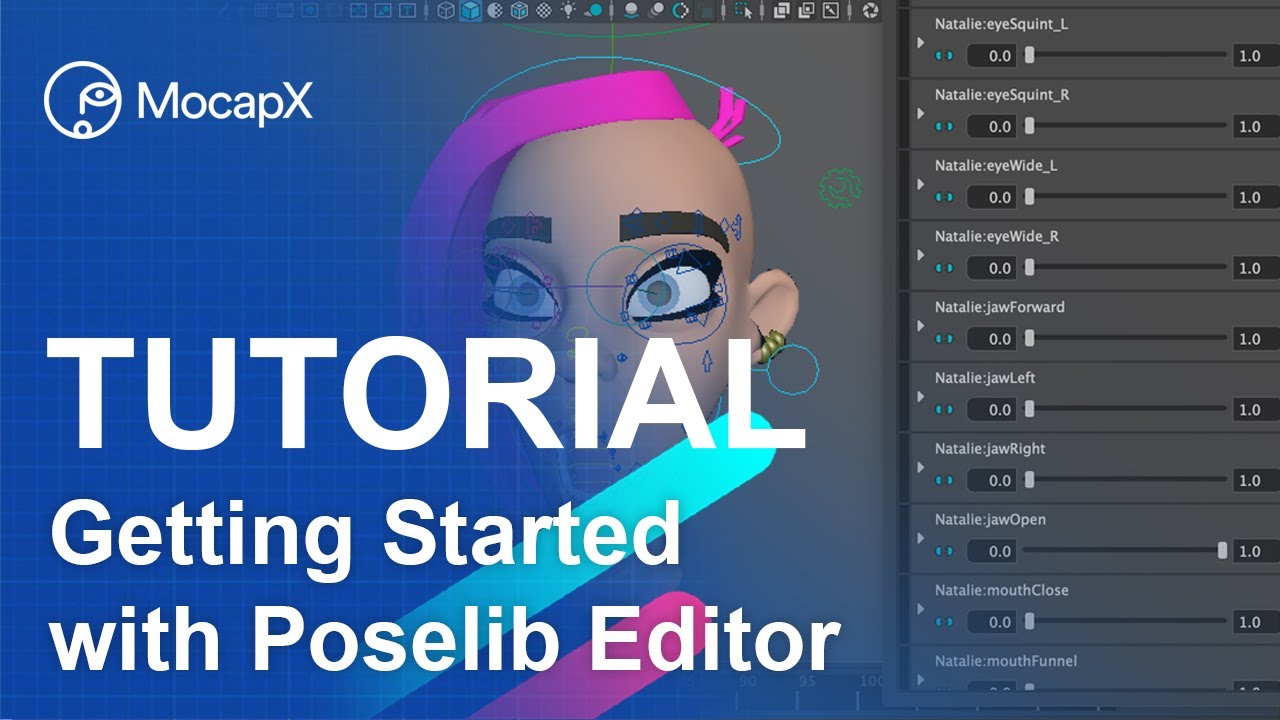
Let’s speed up the tutorial and open a scene where all our poses have already been set. If we open the Poselib editor we can see a list of all our poses.

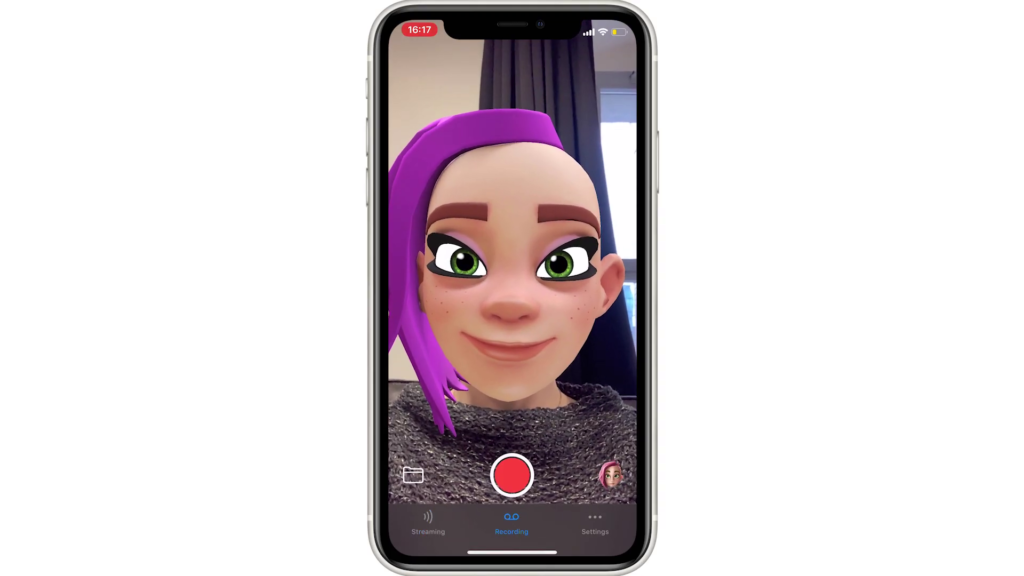
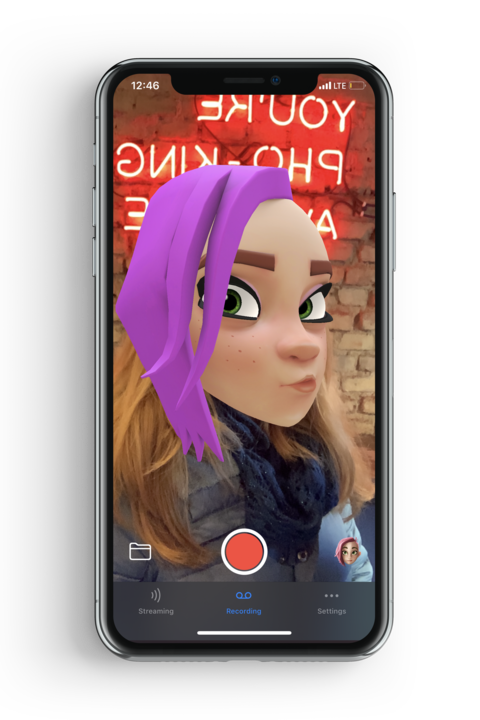
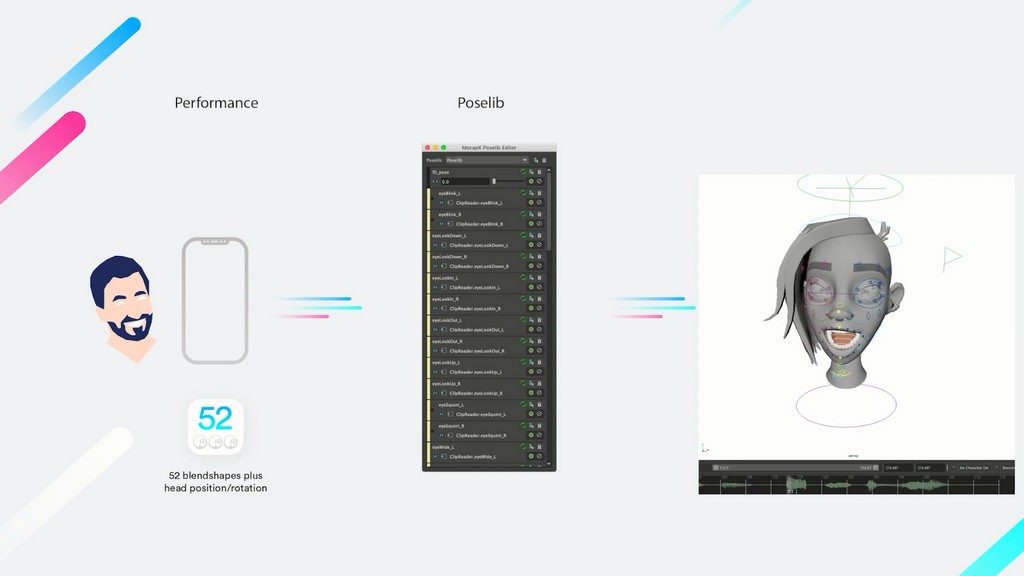
So now we’re ready to create a real-time device. If we go to the attribute editor, we can choose either Wi-Fi or USB. If you have the MocapX app running just click on connect and Maya will connect the app. If we go to the Poselib editor now we can click on auto connect to preview data from the iPhone. Now we’re live streaming motion capture data directly into Maya and onto our character. 

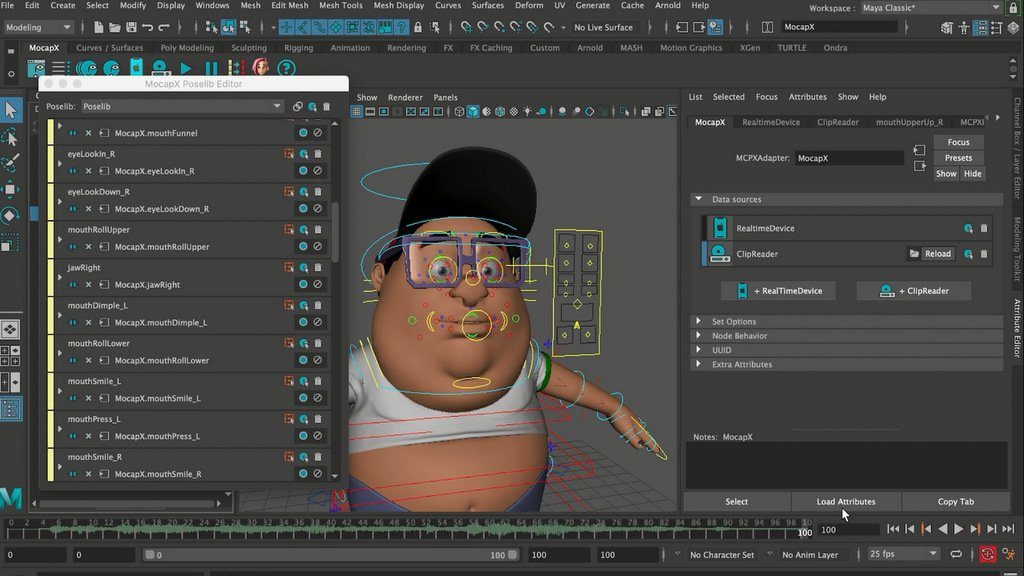
Next, we want to record some action. If we take a look at the real-time device in the attribute editor, there is a recording option. The way Mocapx works is it continuously record all the action, and you can make a clip and save it at any time.

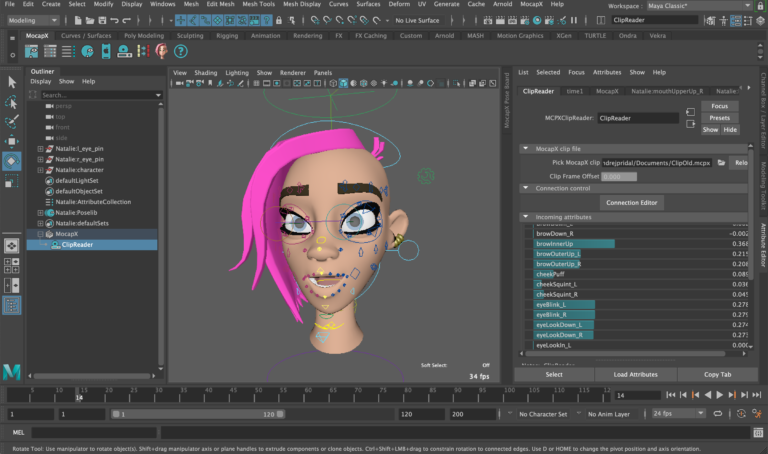
So let’s make a clip that lasts about 10 seconds. Now let’s preview our clip. For this, we go to the MocapX node in the attribute editor and create a clip reader. Now we can switch between real-time and clip.

So let’s load the clip. If we go over our time slider, we can see the data plate on our character. Next, let’s and the head movement.

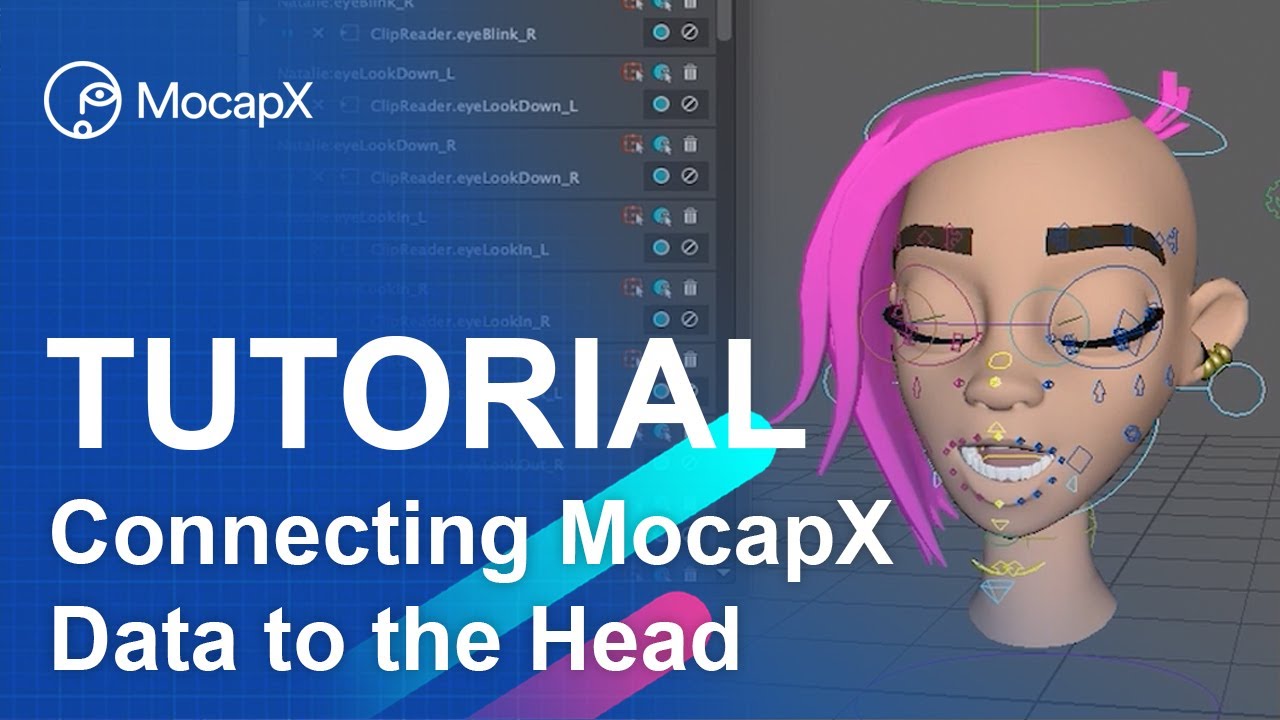
This time we will not use the Poselib editor, but we will directly connect the data to the character. So let’s open the connection editor. We’ll load the clip reader on the left and the controller on the right, which is responsible for the head rotation. Now, we simply connect translation and rotation. We’ve added the head rotation. Let’s add the translation as well. Now if we open the connection editor, we can connect our translation channels as well. We can see the head is moving forward too much. Let’s fix that.

facial mocap maya editor

MocapX has the ability to set keyframes over the motion capture data. We’ll select our controllers.Simply create a key and move the head into the correct position. We can also make multiple keyframes. This can be done for any controller. So for example, we can select the eyebrows. Find a frame where you want to fix the animations. We’ll add a keyframe to the start and another one to the end. 

Now we’ll make a correction between those two keyframes. By doing this, the animator can quickly and easily tweak the animation. We can use a similar technique to connect the eyes as the head. For this, we have a separate tutorial

The final step of working with MocapX is to bake the motion capture down. To bake the animation we use our baking tool. Simply select all the controllers for the head and press the bake button.

Now you can continue with any standard Maya animation tool. That’s it for this tutorial. Thank you for watching.

TUTORIAL – MocapX PoseLib Editor

Tutorial – Learn how to use the PoseLib Editor for complex facial mocap

The MocapX facial mocap can be used with any Maya rig.

To create a more complex connection, MocapX uses its own PoseLib editor.
In PoseLib editor, you can create a pose similar to a blendshape but created from the controllers. These poses are then driven by the data from the iPhone.

1) First, open a PoselIb editor. Then select all the controllers for the character and create attribute collection. Then we are going to shape the pose and hit the pose button.
Then the pose is created and we can see the pose by scrubbing from 0 to 1. We can also tweak the pose by going to the extreme. Tweaking and then updating the pose.

2) Then we can create Realtime Device, and we can connect the jaw open attribute to that pose that we just created.
And now by opening the jaw, we are moving with the pose and simply animating the character to open the jaw as well.

For more complex facial animation, you need to set up up to 52 facial poses to match the iPhone data. To see the description for each expression, please see our documentation.

TUTORIAL – Quickly generate poses (script)

Tutorial – Learn how to quickly generate poses (facial expressions) for MocapX 

In this tutorial, we are going to show you how to speed up the process of creating poses for MocapX motion capture app.

Typically you would start by selecting all of the controllers for the face and then creating attribute collection.
The next step would be to create the first pose. So let’s do eye left blink and name it. Continue with the right blink. This process could be time-consuming.

So let’s look at some of the tips about how to speed up this process.

1) Let’s open a scene where we have all the poses frame by frame in the timeline.
Please note that all of the poses have to be in the same order as they are described in the documentation.
Then we will use our script to generate poses. First, select all the controllers for the face. Create attribute collection. Then select the facial controllers and run the script. By running the script, all 52 poses are created.

2) Next, we need to delete all the keys in the timeline.
Then we can see all the poses in PoseLib editor. After that, we can quickly create a clip reader. Load the clip and preview some of the animation data.

TUTORIAL – Eyes connection

Tutorial – How to connect MocapX facial motion capture data to the eye controller on a rig

In this tutorial, we are going to take a look at how to connect MocapX facial mocap data to the eye controllers in Maya.

1) First, create a demo rig. Just click on the icon of the head in Mocapx shelf and the head rig is created in the scene. Notice that this rig has aim controller for eyes. If your rig has a different eye setup, please check our advanced tutorial on eye connection.

2) Next, create a clip reader and load a clip. Then open a PoseLib and use an auto-connect to connect all poses quickly. So now we do have an animation on the face. Now let’s open the connection editor. On the left side, we are going to load a clip reader. We are going to scroll to the eye rotate attributes.  These attributes are responsible for eye movement.

The problem is that a rig has aim controls that have only translate attributes.  So what we need to do is to create a locator that will help us to transfer the animation. If we look at the outliner, we already have a locator in the scene. So If we select the locator and rotate with it, the aim controller is moving as well.

3) Next, let’s delete these locators and start from scratch. Create a locator and give it a name. Move it into the center of the eye and adjust its size. Now we need to select the locator – shift select the aim controller for the eye, and then we go to parent constraint -> option box -> let’s restore to defaults and uncheck the rotation. So now if we rotate the locator, we are also moving the aim. 

Let’s do it the same for the other eye. Duplicate the locator and create a constraint. Now we need to take both of these controllers and group them. Then we need to select the head control and shift select the group with locators and do parental control, but this time we want to do translate and rotate. So now when you move with the rig, the locators follow. The last step is to load the locator on the right side of the connection editor. And then we connect the rotation attributes from a clip reader to that locator. Let’s do it for the other locators as well. And now we have movement of the eye. So let’s add the head rotation. Load the head controller in the connection editor and connect head rotation from clip reader to the head controller. And now we have both head and eyes movement.

TUTORIAL – Head connection

Tutorial – How to connect MocapX data to head controller on rig

TUTORIAL HEAD CONNECTION – Connecting MocapX facial motion data to the head in Maya

In this tutorial, we’re going to show you how to connect MocapX data to head rotation and translation. 

1) First, create a demo rig by clicking on the head icon on the shelf. Then create a clip reader and load a clip. Now open a PoseLib editor. Use auto-connect to connect all poses to clip quickly. Now we have animation on the face, but we need to add the rotation and translation for the head. 

2) Let’s open the connection editor. On the left side, we’re going to load the clip reader, and on the right side, we’re going to load the controller for the head.

Select the one that is responsible for head rotation. Now connect the rotations from clip reader to the controller. Now the rotation of the head works. 

3) The next step is to connect the translate of the head. Let’s select the controller and connect the translate from the Clip reader. Now you can see that we have the movement of the head.

In this case, the motion is really small. So let’s make it bigger. First, we’re going to bake this controller. In graph editor, we’re going to scale the curves. By doing this, you can control the amount of motion. Also, you can do the same for rotation.

MocapX – Facial Motion Capture App for iPhoneX