Tutorial – Learn how to animate face from Zbrush and use it for facial motion capture
In today’s tutorial, we’re going show you how to create blendshapes in Zbrush or any other sculpting software and then bring these blendshapes back into Maya and connect them with MocapX.
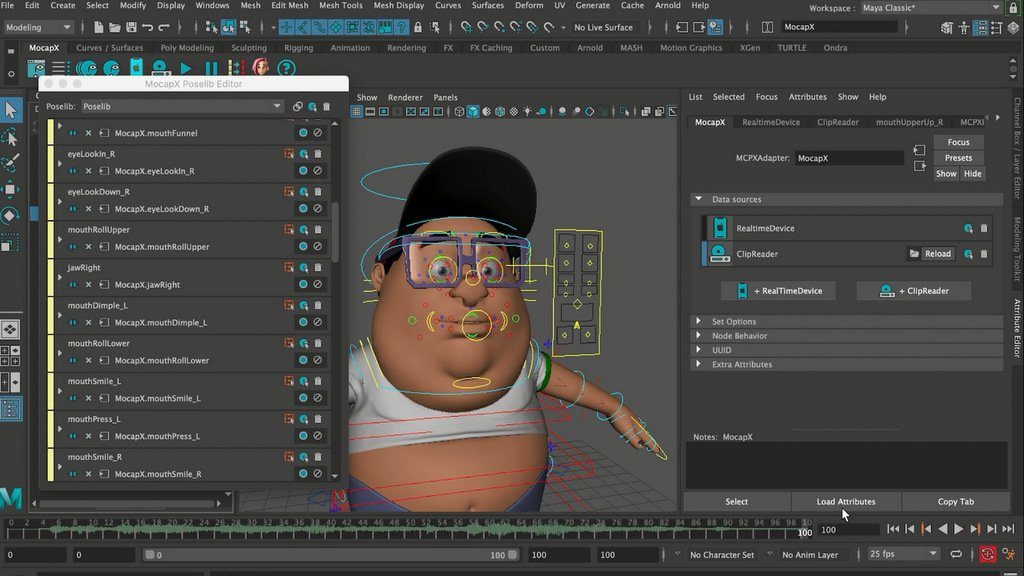
First, let’s open Zbrush with a sculpt of a basic head. We need to create blendshapes. Let’s go to Zplugins, and under Maya Blend Shapes, click create new. Now, if we go to the layers tab, we can see a new layer. Let’s rename this to eyeBlink_L.
Now we will shape the geometry. So let’s select the Move brush and shape the pose. If we are finished, we can see the blendshape by moving the slider. Let’s continue and create a blink for the right eye. So go to the blendshape tab. Click create new. Now we can see another layer. Let’s call it eyeBlink_R. Now let’s do the same for the right eye.
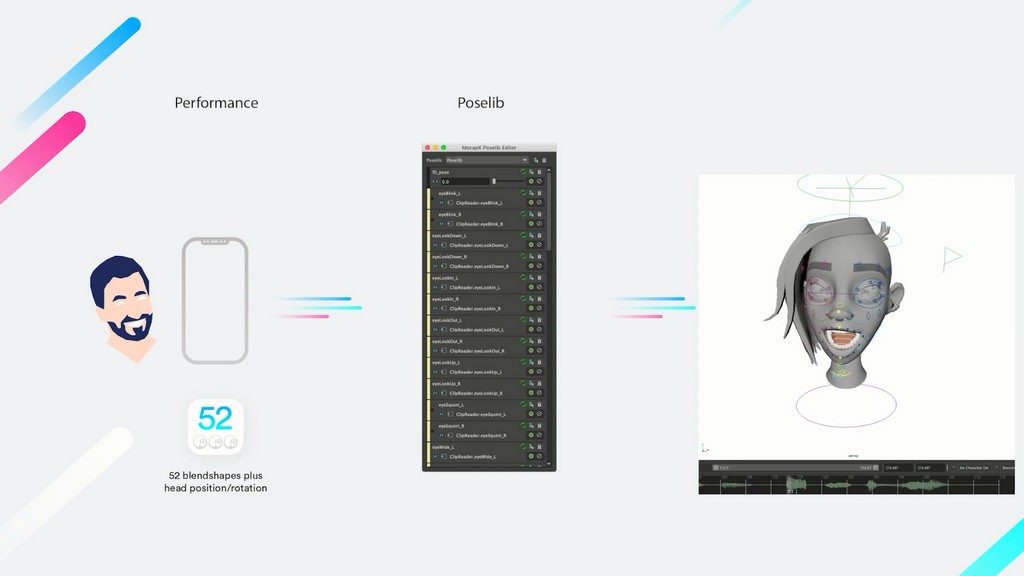
Now we are live streaming data to our character. Let’s add the head movement. So select the geometry and load it on the right side. Now we will connect: translate and rotate from the Real-Time device to our head. So we’ve added the translate and rotate.
The last step is to add the eye movement. Let’s select the left eye. Load it on the right side and connect the rotation from Real-Time. Now let’s do the same for the Right eye. Now lets record some data for the clip. Go to the Realtime device, select a 15 sec clip, and hit record. By doing this, we record the past 15 second to clip. Next, let’s preview the clip.
So we will select a Mocap node. Create a Clip reader and load that clip. If we go to the time slider, we can now scrub and see our clip. If we switch to Real-Time again, we’re still streaming from the iPhone. If we go back to the Clip reader and select the head, we can use our Baking tool for baking data from the clip to an fbx file. Now we can export this animation as an fbx to Unity or Render in Maya.