Tutorial – Learn how to use MocapX and Advanced Skeleton rig
In this tutorial, we’re going to learn how to use the advanced skeleton rig or any other custom facial Rig together with MocapX. We will start by downloading an example Rig from the advanced skeleton page. You can use any of these rigs, but we’re just going to choose this one.
Now if we open Maya, we can see that the facial Rig has a combination of several different types of controllers. Some are on the face itself others are on a separate picker with other attributes such as blinking.
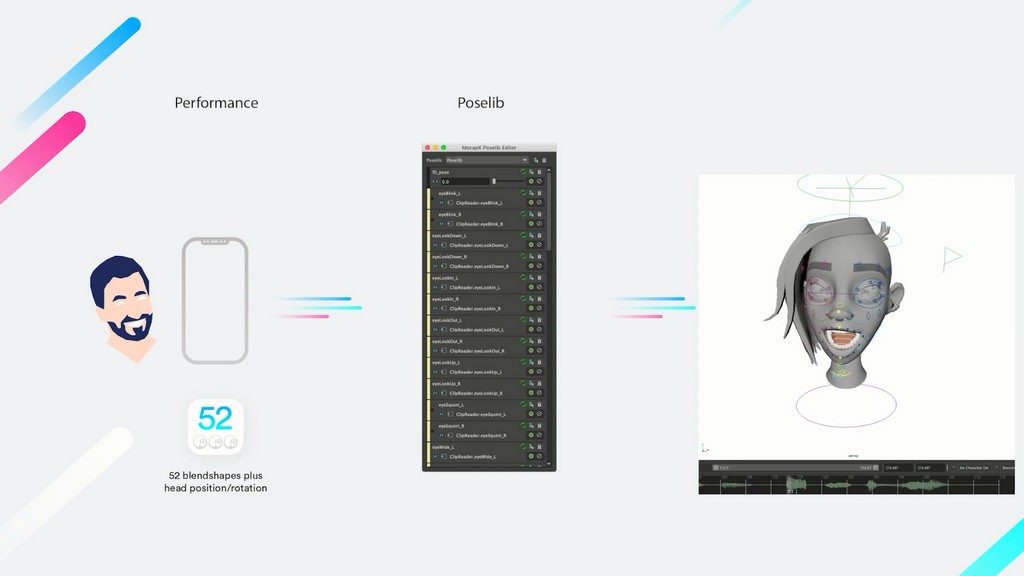
The way it works is that it transfers the facial expression which is captured on iPhone onto the Rig controllers. For this, we use the Poselib Editor to match these Expressions. The idea is that the rig should end up with keyframes directly on the controller’s just as an animator would use classic keyframe animation. This, in general, gives the animator a chance to work efficiently with the motion capture data and still have the ability to do keyframe animation.

So let’s start with creating poses for this character. Make sure that you have a natural or relaxed face with open eyes as your default pose. This will always be our Base pose. We’ll start by selecting all the controllers on the head and create an attribute collection which stores all the channels. Next, we will make our first pose which is a left eye blink. We’ll take the controller and shape the eye into a blink.
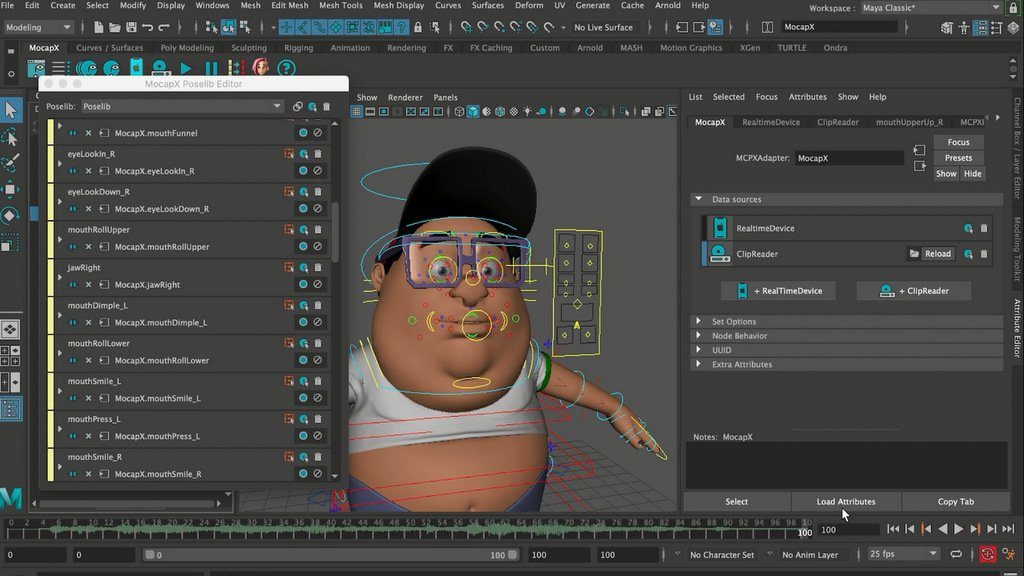
We can use all the controllers for the attribute collection. Once we are done, we can click the button for creating the pose. Now if we open the Poselib editor, the first pose is created. We can use the slider and move it to see our pose. Let’s rename it to EyeBlink_L.
Now let’s do the right eye. First, we need to go back to default. Now let’s shape the right eye blink and click the button again. Now we can see both our poses. It’s similar to blend shapes but done with controllers. If you name the poses according to the description, you can later use the auto-connect feature to match them with the data from your iPhone.
Let’s speed up the tutorial and open a scene where all our poses have already been set. If we open the Poselib editor we can see a list of all our poses.
So now we’re ready to create a real-time device. If we go to the attribute editor, we can choose either Wi-Fi or USB. If you have the MocapX app running just click on connect and Maya will connect the app. If we go to the Poselib editor now we can click on auto connect to preview data from the iPhone. Now we’re live streaming motion capture data directly into Maya and onto our character.
Next, we want to record some action. If we take a look at the real-time device in the attribute editor, there is a recording option. The way Mocapx works is it continuously record all the action, and you can make a clip and save it at any time.
So let’s make a clip that lasts about 10 seconds. Now let’s preview our clip. For this, we go to the MocapX node in the attribute editor and create a clip reader. Now we can switch between real-time and clip.
So let’s load the clip. If we go over our time slider, we can see the data plate on our character. Next, let’s and the head movement.
This time we will not use the Poselib editor, but we will directly connect the data to the character. So let’s open the connection editor. We’ll load the clip reader on the left and the controller on the right, which is responsible for the head rotation. Now, we simply connect translation and rotation. We’ve added the head rotation. Let’s add the translation as well. Now if we open the connection editor, we can connect our translation channels as well. We can see the head is moving forward too much. Let’s fix that.

MocapX has the ability to set keyframes over the motion capture data. We’ll select our controllers.Simply create a key and move the head into the correct position. We can also make multiple keyframes. This can be done for any controller. So for example, we can select the eyebrows. Find a frame where you want to fix the animations. We’ll add a keyframe to the start and another one to the end.
Now we’ll make a correction between those two keyframes. By doing this, the animator can quickly and easily tweak the animation. We can use a similar technique to connect the eyes as the head. For this, we have a separate tutorial.
The final step of working with MocapX is to bake the motion capture down. To bake the animation we use our baking tool. Simply select all the controllers for the head and press the bake button.
Now you can continue with any standard Maya animation tool. That’s it for this tutorial. Thank you for watching.


